
☕ Summarise this article with AI
Is your coffee too bitter, too light or simply bland? The problem lies in your dosage.
The universal golden rule: 7 grams of ground coffee per 100ml of water (i.e. 60-70g per 1 litre).
In this guide, you will discover :
- The exact dosage table for your coffee maker
- A simple calculator so you can never go wrong
- How to adjust to your tastes
- Mistakes that ruin your coffee
Reading time: 5 minutes | Time for a perfect coffee: 4 minutes
Coffee Piston Dosage Chart (Printable)
Use this table as a cheat sheet for dosing without scales:
| Coffee maker size | Volume of water | Café LÉGER | Café ÉQUILIBRÉ | Café CORSÉ | Soup spoons |
|---|---|---|---|---|---|
| Petite | 350ml | 16g | 25g | 32g | 2 spoons |
| Average | 500ml | 23g | 35g | 45g | 3 spoons |
| Standard | 800ml | 37g | 56g | 70g | 5 spoons |
| Grande | 1 litre | 47g | 70g | 88g | 7 spoons |
📌 Quick reminder :
- 1 heaped tablespoon = 10-12g ground coffee
- Universal ratio = 1:14 (1g of coffee to 14ml of water)
- Mandatory grind: Coarse (coarse salt)
Mental Express calculator (without scales)
Don’t have a scale? Use this formula in 3 seconds:
📐 The Magic Formula
Volume of your coffee maker (ml) ÷ 14 = Grams of coffee
Concrete examples:
- 350ml coffee pot → 350 ÷ 14 = 25g of coffee
- 500ml coffee pot → 500 ÷ 14 = 35g of coffee
- 800ml coffee pot → 800 ÷ 14 = 57g of coffee
- 1L coffee maker → 1000 ÷ 14 = 71g of coffee
💡 Intensity adjustment :
- LIGHTER coffee → divide by 15 instead of 14
- HEAVIER coffee → divide by 13 instead of 14
Soup Spoon Conversion (Without Scale)
Precise Equivalences
1 tablespoon ground coffee = 1 tablespoon ground coffee = 1 tablespoon ground coffee
- Curved: 10-12 grams
- Shave: 7-8 grams
1 teaspoon =
- Domed: 3-4 grams
Fast dosing by size
| Coffee maker | Curved soup spoons |
|---|---|
| 350ml (2 cups) | 2 spoons |
| 500ml (3 cups) | 3 spoons |
| 800ml (5 cups) | 5 spoons |
| 1 litre (6-8 cups) | 7 spoons |
🎯 Visual tip: The ground coffee should form a 1 to 1.5 cm layer at the bottom of your empty coffee maker.
The Perfect Recipe in 7 Steps (4 Minutes)
✅ STEP 1: Dosage of coffee (30 seconds)
For 1 litre of water :
- Weigh out 70 grams of coarse ground coffee
- OR 7 heaped tablespoons
Required grind: Coarse as coarse salt (not fine as flour)
💡 No mill? Find out how to grind without equipment →
✅ STEP 2: Heat the water (3 minutes)
Ideal temperature: 92-95°C
Without thermometer :
- Boil the water (100°C)
- Wait 30-40 seconds
- It will be at 92-95°C
Type of water: Filtered if possible (avoid hard water)
✅ STEP 3: Preheat the coffee maker (10 seconds)
- Rinse inside with hot water
- Empty completely
- Add the ground coffee
What’s the point? To avoid the thermal shock that cools the infusion.
✅ STEP 4: Pour and mix (20 seconds)
- Pour the hot water in a circular motion
- Mix gently for 10 seconds with a spoon
- Fit the cover (piston in UP position)
Objective: All the coffee should be well moistened.
✅ STEP 5: Infusion (4 minutes)
⏱️ Set your timer for exactly 4 minutes
- Café LÉGER → 3 minutes
- ÉQUILIBRÉ coffee → 4 minutes
- Coffee CORSÉ → 5 minutes
🚫 Do not touch ANYTHING during brewing.
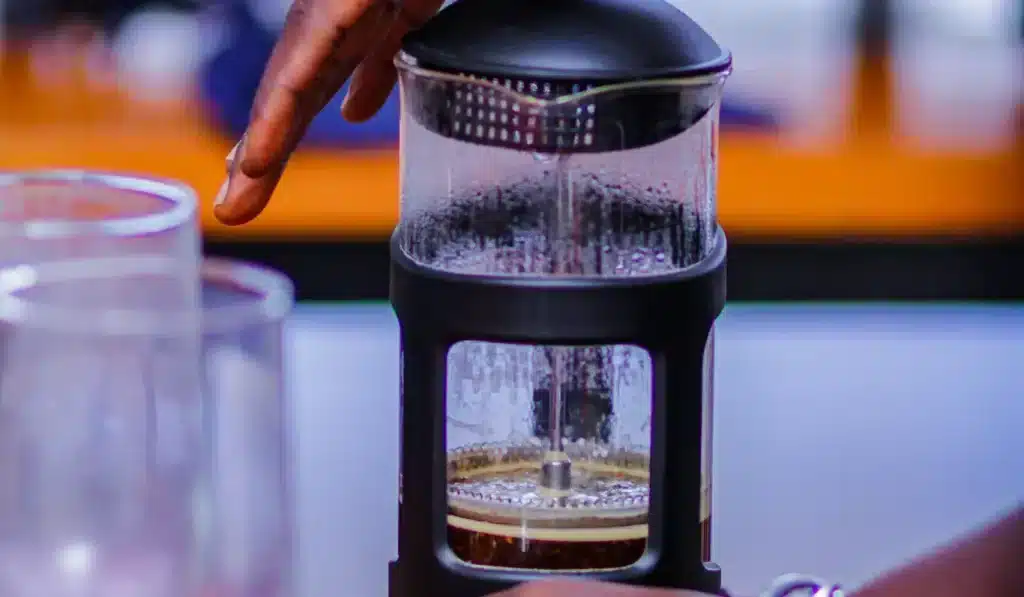
✅ STEP 6: Pro “Casser la Croûte” technique (30 seconds – OPTIONAL)
3min30 from brewing:
- Remove the cover
- Using a spoon, gently break the crust that has formed on the surface.
- Remove the foam with the spoon
- Wait 30 seconds for the residue to fall off
Result: Clearer coffee, less grounds in the cup.
✅ STEP 7: Press and serve (30 seconds)
- Lower the piston VERY SLOWLY (count 20-30 seconds)
- If strong resistance → your grind is too fine
- Serve IMMEDIATELY in pre-warmed cups
⚠️ GOLDEN RULE: NEVER leave the coffee to stand in the coffee maker after pressing. It will continue to brew and become bitter. Transfer to a thermal carafe if you’re not serving immediately.
SOS Café Raté: The 4 Problems and Solutions
❌ Problem 1: Coffee too light / No taste
Symptoms :
- Pale, transparent colour
- Watery, bland taste
- No body in the mouth
✅ Immediate solutions:
- Increase the coffee → Add 10g (1 spoonful)
- Check the temperature → Water at least 92°C
- Increase the infusion time → Increase from 4 to 5 minutes
- Refine the grind → A little less coarse (but not fine!)
Test: Your coffee should be opaque dark brown and leave a trace on the cup.
❌ Problem 2: Coffee too bitter
Symptoms :
- Persistent unpleasant aftertaste
- Dry mouth
- Burnt or metallic taste
✅ Immediate solutions:
- Reduce the coffee → Remove 10g
- Lower the temperature → Wait 45s after boiling (88°C)
- Shorten the infusion → Go from 4 to 3 minutes
- Check the grind → Must be COARSE
💡 Tip: Some coffees are naturally less bitter. Discover the best non-bitter coffee beans →
Common cause: Pre-ground supermarket coffee = often too fine for the piston.
❌ Problem 3: Troubled coffee with residue
Symptoms :
- Coffee grounds in the cup
- Unpleasant grainy texture
- Opaque coffee
✅ Immediate solutions:
- Coarser grind → Cause #1 of the problem
- Slow down the descent → Minimum 30 seconds to press
- Crust” technique → Remove the foam before pressing
- Check the seal → Must be clean and correctly positioned
Visual cue: The grind should look like gravel, not flour.
❌ Problem 4: Inconsistent result
Symptoms :
- Yesterday perfect, today a failure
- Impossible to reproduce the same taste
- Sometimes too strong, sometimes too light
✅ Definitive solution: THE BALANCE
Invest £15 in a kitchen scale. It’s THE change that will transform your coffee.
Routine consistency:
- Weigh the coffee AND the water each time
- Use a timer (4 minutes precise)
- Same coffeemaker, same temperature
- Write down your ideal recipe
Result: After 3-4 coffees, you’ll be able to reproduce YOUR perfect dosage every morning.
Adjust to Your Tastes (Progressive Method)
🥉 Beginner level : Safe dosing
Objective: Get it right first time, without risk.
Basic recipe :
- 70g of coffee for 1L of water
- Coarse grinding
- Infusion time 4 minutes
- Water at 92°C
Tip: Use this same recipe 5 times in a row before changing anything. That way you’ll have a reliable reference.
🥈 Intermediate level: Customisation
Objective: Adjust to your preferences.
Diagnostic grid :
| Your coffee is… | Action |
|---|---|
| ❄️ Too light | +10g coffee OR +30s brewing time |
| 🔥 Too strong/bitter | -10g of coffee OR -30s brewing time |
| ✅ Perfect | Write down the recipe in a notebook! |
💡 Pro tip: Take a photo of your packet of coffee with the dosage that worked. Every origin reacts differently:
- Light Ethiopian coffee → 75g/L
- Full-bodied Robusta → 60g/L
📖 Going further: What type of coffee to choose for your piston →
🥇 Expert level: Complete mastery
Objective: To interact with your coffee and extract the best from it.
Adjustment according to origin
| Origin | Profile | Dosage | Infusion | Temperature |
|---|---|---|---|---|
| 🌍 Africa (Ethiopia, Kenya) | Acidic, fruity | 65-70g/L | 3min30 | 94°C |
| 🌎 South America (Brazil, Colombia) | Balanced, gentle | 70g/L | 4 minutes | 92°C |
| 🌏 Asia (Indonesia, Vietnam) | Heavy, earthy body | 60-65g/L | 4min30min | 88°C |
Adjustment according to roast
| Roasting | Dosage | Temperature |
|---|---|---|
| ☕ Claire (light roast) | 75g/L | 94°C |
| ☕☕ Medium roast | 70g/L | 92°C |
| ☕☕☕ Dark roast | 65g/L | 88°C |
The “Bloom” Technique (Pre-infusion)
- Pour just 50ml of hot water over the coffee
- Wait 30 seconds for the aromas to “flower”.
- Pour in the rest of the water and continue as normal
Result: More homogeneous extraction, more complex aromas.
The Equipment That Changes Everything (Budget €15-150)
🏆 Investment #1: Precision Scale (15-30€)
Impact on your coffee: 10/10
Why it’s essential:
- Dosage to the nearest gram
- Perfect reproducibility
- The end of approximations
What you need :
- Accuracy: 1 gram is enough
- Capacity: Minimum 500g
- Tare function (reset to zero)
- Price: €15-20 on Amazon
Recommended models :
- Amazon Basics kitchen scale (£15)
- Hario V60 Drip Scale (€50 – with timer)
⚙️ Investment #2: Coffee grinder (€40-150)
Impact on your coffee: 9/10
Pre-ground coffee loses 60% of its aroma in 15 days. Grind just before brewing = incomparably better coffee.
Option A: Manual Mill (€40-60)
✅ Advantages :
- Economical
- Silencer
- Perfect for 1-2 people
- Precise control
❌ Disadvantage:
- Physical effort (2-3 min cranking)
Recommended models :
- Hario Mini Mill (€40)
- Porlex Mini (€50)
Option B: Electric Grinding Mill (€100-150)
✅ Advantages :
- Fast and effortless
- Regular grinding
- Several settings
❌ Disadvantages:
- Noisier
- Higher investment
Recommended models :
- Melitta Calibra (€100)
- Wilfa Svart Aroma (€150)
⚠️ AVOID: Mills with blades (like spice grinders). They chop unevenly and create heat which alters the flavours.
🔥 Investment #3: Temperature kettle (€40-80).
Impact on your coffee: 6/10
Option A: Classic kettle (Free)
Technique: Boil, then wait 30-40 seconds.
Option B: Adjustable kettle (€40-80)
Advantages :
- Precise temperature (85°C, 90°C, 95°C)
- Temperature maintenance
- Handy if you also make tea
Recommended models :
- Aigostar King (€40)
- Bosch TWK8613P (80€)
💰 Summary by Budget
| Budget | Equipment | Total |
|---|---|---|
| 🎯 Beginner | Kitchen scale 15€ + Pre-ground coffee special piston | 30€ |
| 👍 Intermediate | Scale 30€ + Manual grinder 40€ + Coffee beans | 100€ |
| ⭐ Expert | Scales 50€ + Electric mill 150€ + Adjustable kettle 80€. | 280€ |
Our advice: Start with the €15 scales. It will have the most immediate impact.
Frequently asked questions (FAQ)
❓ How many grams of coffee for 500ml of water?
Answer: 35 grams (or 3 heaped tablespoons)
Calculation: 500ml ÷ 14 = 35g
❓ How much coffee for 1 litre of water in a piston coffee maker?
Answer: 60 to 70 grams (or 6-7 heaped tablespoons)
- Light coffee: 60g
- Balanced coffee: 70g
- Strong coffee: 80g
❓ Can fine ground coffee be used in a piston coffee maker?
No, that’s the most common mistake.
Fine grind = over-extraction = bitter coffee + residue in the cup.
Solution: Coarse grind required (like coarse sea salt).
❓ How long does it take to brew a piston coffee?
Answer: 4 minutes is the standard.
- Light coffee: 3 minutes
- Balanced coffee: 4 minutes
- Strong coffee: 5 minutes
Maximum recommended: 5 minutes. After that, the bitterness dominates.
❓ What water temperature for a piston coffee maker?
Answer: 92-95°C is the ideal range.
Without a thermometer: Bring to the boil, then wait 30-40 seconds.
Why not 100°C? Boiling water burns the coffee and creates bitterness.
❓ Can piston coffee be reheated?
No, not in the microwave.
Reheated coffee loses its aroma and becomes bitter.
Solution: Pour the coffee into a thermal carafe after brewing. It will stay hot for 2-3 hours with no change in flavour.
❓ How many cups with 1 litre of water?
Answer: 6 to 8 cups, depending on the size of the cups.
- Small cup (120ml): 8 cups
- Medium cup (150ml): 6-7 cups
- Mug (250ml) : 4 mugs
❓ Should the coffee be rinsed before brewing?
No, it’s not necessary, and it’s not even advisable.
The ‘bloom’ (pre-infusion with 50ml of water) is enough to release the aromas.
Rinsing = loss of soluble aromas.
❓ Coffee beans or ground coffee for plunger coffee maker?
Freshly ground coffee beans = always better.
Ground coffee loses 60% of its aroma in 15 days.
If you don’t have a grinder: Buy coffee specially ground for piston coffee makers (coarse grind). Avoid “universal” coffee that is too fine.
Conclusion: Your Perfect Coffee in 3 Actions
You now have all the keys you need to make a successful plunger coffee every time.
🎯 Remember the essentials:
1. The golden rule: 7g of coffee per 100ml of water
(i.e. 70g for 1 litre)
2. The 3 pillars of perfect coffee :
- ✅ Precise dosing (invest in a €15 scale)
- ✅ Coarse grind (like coarse salt)
- ✅ Constance (same recipe = same result)
3. Your immediate action plan :
- [ ] Print the dosing table
- [ ] Test the basic recipe (70g/L, 4 min, 92°C)
- [ ] Write the result in a notebook
- [ ] Adjust by ±10g to taste
- [ ] Buy a kitchen scale (€15)
💡 The final secret
The perfect dosage doesn’t exist in the absolute, it exists for YOU. It’s the one that makes you say “ah, that’s exactly how I like it” every morning.
Experiment without fear, note down your results, and in a few weeks you’ll be your own expert barista.